In the section "Stock management" / "Stockpiles" you can view, edit products and create new ones.
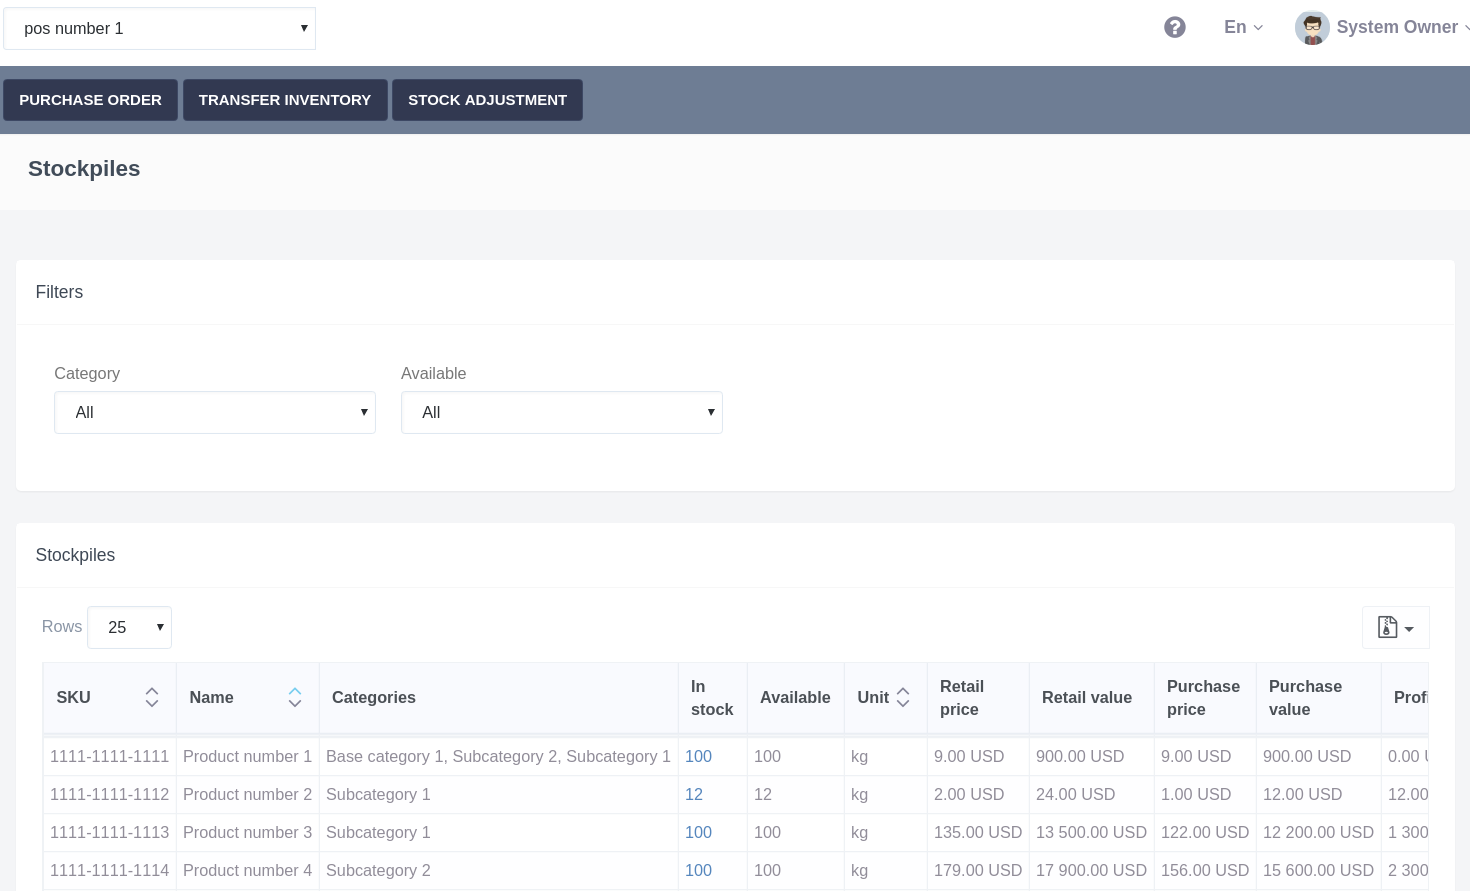
The page displays information about stocks, switching stocks (if more than one) is available from the drop-down list at the top of the page (POS switcher).
For a quick search on the page, a filter is available (see section "User Filter") by catalog category and by availability. Filtering options by availability:
- All - a complete list of categories (without a filter).
- In stock - quantity> 0 (available)
- Low - quantity from 1 to 9
- Out of stock - quantity == 0
On the page in the column "In stock" - a digit, which is the link to the information window "Stockpile history" (for the selected stock).
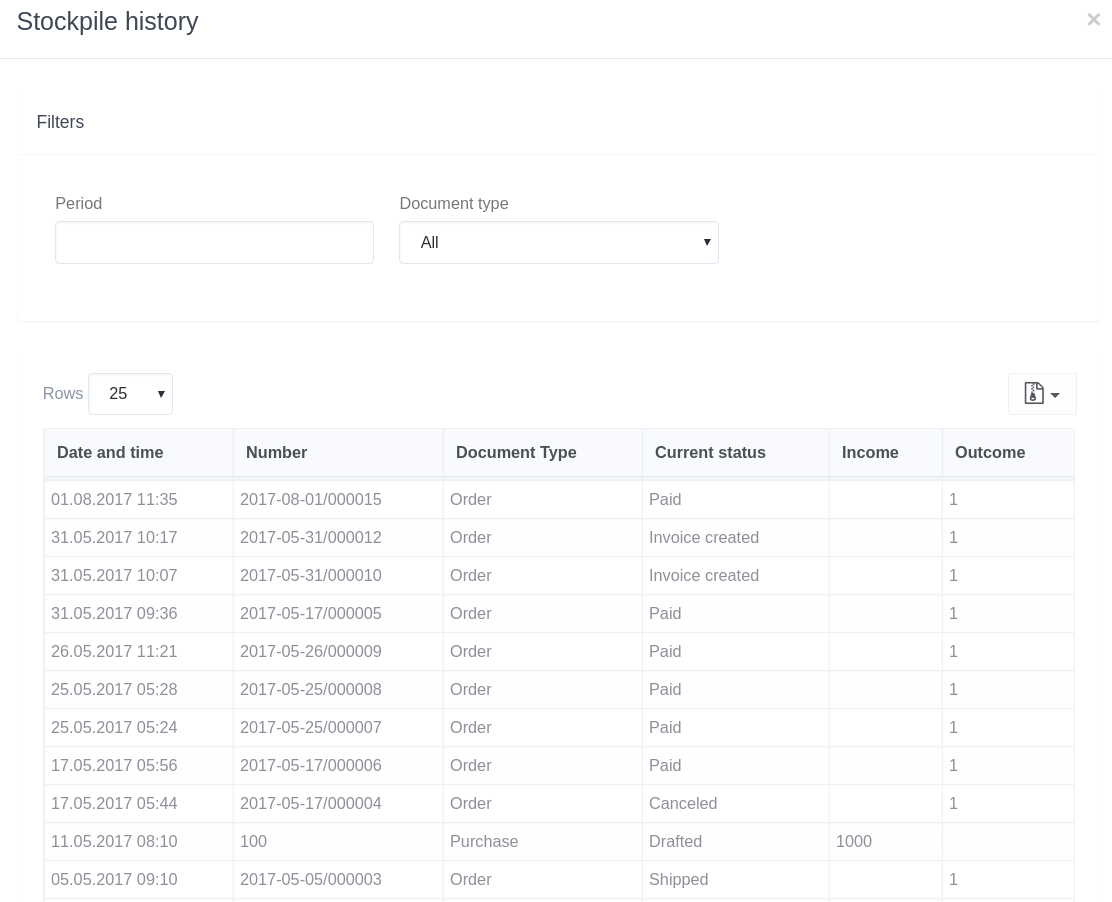
On the opened form, you can filter products, using the filter Period and Document type.
The following actions are available in the section:
- Purchase order.
- Transfer inventory.
- Stock management.
Purchase order
The order is created in three steps. In order to create a new order, follow these steps:
- Click on the "Purchase order" button on the toolbar.
- On the "Common information" page (the first step) of the creation order fill out the form.
Recommendations for filling out the form:
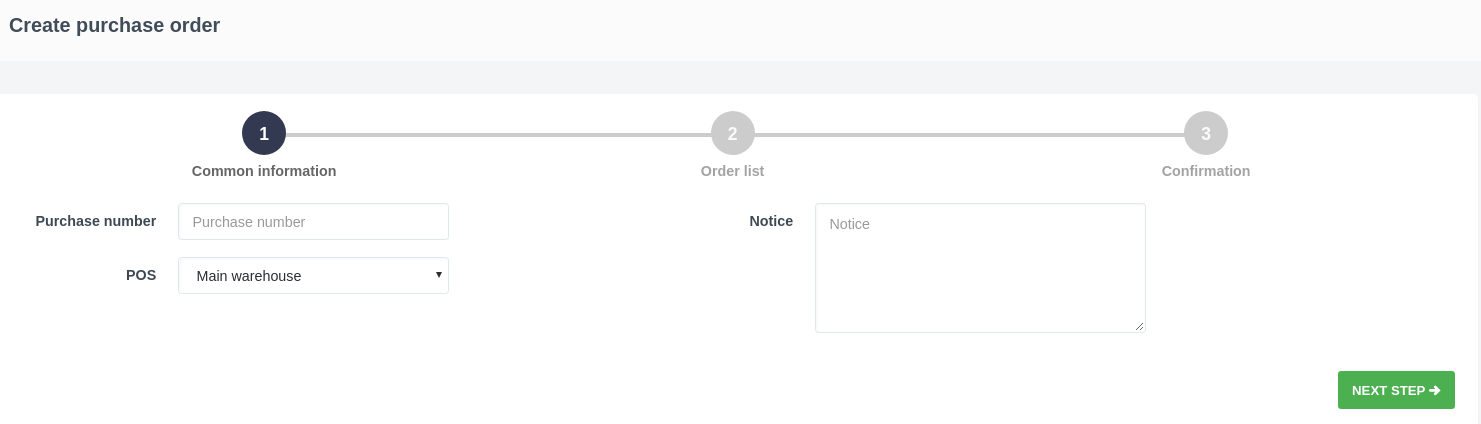
- Purchase number - enter the number of the created order (optional).
- POS - select a stock from the list of available.
- Notice - enter a note to the created order, which will be displayed on the page with detailed information of this order (optional).
3. After filling out the form, click the "Next Step" button. On the page of the second step "Order List", you must select the products, that will be included in the order. On the page you can search by category, by SKU (product number) and by product name. You can also mark the field "Only products in stock", in order to display only products, that are in stock (for which the balance is greater than 0).
To add a product you need to change its quantity. To do this, click on the "pencil" icon in the column "Quantity"; and in the opened form enter the necessary quantity of the product and press "Ok".
You also can import the product list to a file. When completing the form, click the "Next Step" button.
4. The third step displays the entire order. Here there is ability to edit the quantity, document number, note, and also remove the product.
By clicking on the "plus"icon a window with a list of products opens. To select the product to add, specify its quantity, using the "pencil" icon. Then click the "Ok" button and the product will be added to the order list.
5. Check the data and click "Confirm and create" to create the order. There is a transition to the "Documents" page, where the list of documents, including the created order (document type "Purchase"), is displayed.
Transfer inventory
A new document for transfer inventory between stocks is created in three steps. To create a new document, follow these steps:
- Click the "Transfer inventory" button on the toolbar.
- On the "Common Information" page (the first step) of the creation document fill out the form.
Recommendations for filling out the form:
- Transfer number - enter the number of the created document (optional).
- Source POS - select the stock, from which the stockpiles will be transferred from the list of available ones.
- Destination POS - select the stock, to which the stockpiles will be transferred, from the list of available ones.
- Notice - enter a note to the document you are creating (optional).
3. After filling out the form, click the "Next Step" button. On the page of the second step "Product List" you need to set the number of products to be transferred. On the page you can search by category, by SKU (product number)/product name. You can also mark the field "Only products in stock", in order to display only products, that are in stock (for which the balance is greater, than 0).
To add a product you need to change its quantity. To do this, click on the "pencil" icon in the column "Quantity" and in the opened form enter the necessary quantity of the product and press "Ok".
You can import the product list to a file. When completing the form, click the "Next Step" button.
4. The third step displays the entire order, with the ability to edit the quantity, document number, note, and remove the product.
By clicking on the "plus" icon, a window with a list of products opens. To select the product to add, specify the quantity, using the "pencil" icon. Then click the "Ok" button and the product will be added to the document.
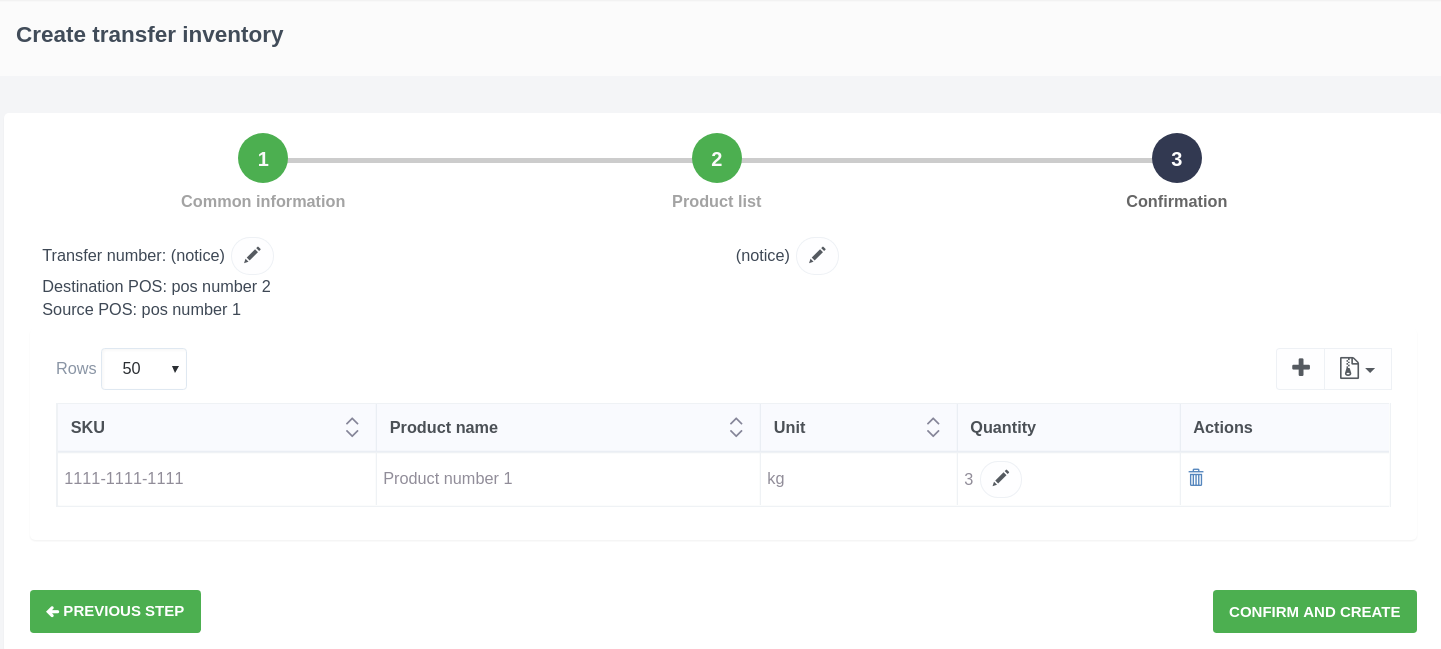
5. Check the data and click "Confirm and Create" to create the document. There is a transition to the "Documents" page, where a list of documents, including the created document (document type "Transfer"), is displayed.
Stock management
A new document for adjusting the balances in the stock is created in three steps. To create a new document, follow these steps:
- Click on the "Stock management" button on the toolbar.
- On the "Common Information" page (the first step) of the creation document fill out the form.
Recommendations for filling out the form:
- Document number - enter the number of the prepared document (optional).
- POS - select the stock, from which the movement of the balances will occur, from the list of available ones.
- Notice - enter a note to the document you are creating (optional).
3. After filling out the form, click the "Next Step" button. On the page of the second step "Product List" you need to set the number of products to be transferred. On the page you can search by category, by SKU (product number)/ product name. You can also mark the field "Only products in stock", in order to display only products, that are in stock (for which the balance is greater, than 0).
To add a product you need to specify its quantity. To do this, click on the "pencil" icon in the column "Quantity" and in the opened form enter the necessary quantity of the product and press "Ok".
You can import the product list into a file (see "Working with tables"). When completing the form, click on the "Next Step" button.
4. The third step displays the entire order, with the ability to edit the quantity, document number, note, and remove the product.
By clicking on the "plus" icon, a window with a list of products opens. To select the product to add, specify the quantity, using the "pencil" icon. Then click the "Ok" button and the product will be added to the document.
5. Check the data and click "Confirm and Create" to create the document. There is a transition to the "Documents" page, where the list of documents, including the created document (document type "Adjustment"), is displayed.
Daria T.
Comments