In the "Orders" page you can view, search, edit, delete and create orders on the products of application.
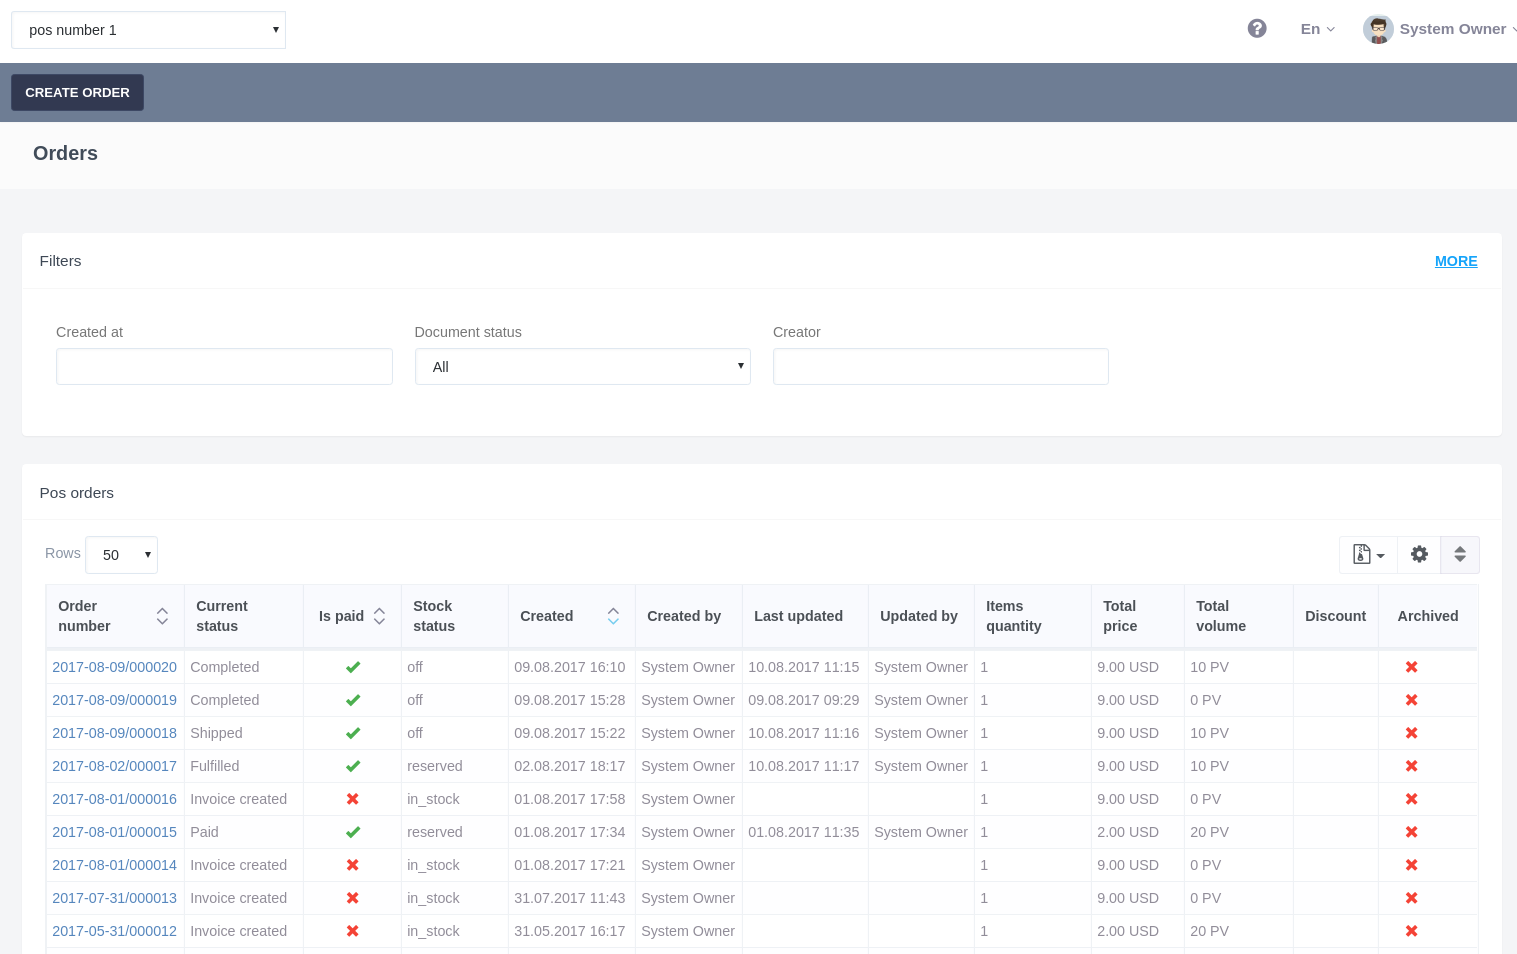
The page contains such information about the created orders, as the order number, its current statuses (presence in the stock, paid / unpaid, invoice created / completed / returned, etc.), creation and update dates, price, total volume etc. You can find out the complete information by clicking on the link, which is the order number.
Data on the page can be filtered, using a custom filter (see section "User Filter"). On the "POS.Orders" page, you can filter data by creation date (select using the calendar), by document status and by creator.
An advanced filter is also available.
Create order
Creating an order consists of three steps. To create a new order, you must perform the following actions
- Click on the "Create order" button on the functional taskbar.
- On the "Common information" page (first step) fill in the fields:
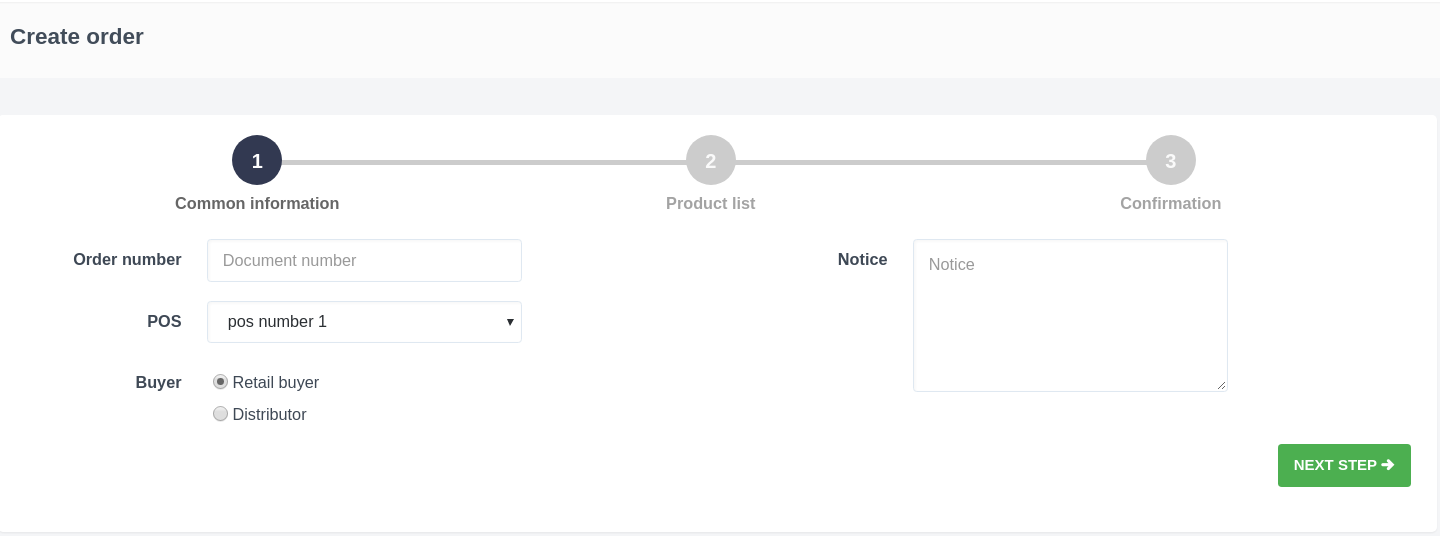
- Order number - enter the number of the created order (optional).
- POS - select the stock from the list of available.
- Buyer - choose one of the two options: Retail buyer or Distributor.
- Retail buyer - if this option is selected, the order is created for any buyer.
- Distributor - when this option is selected, two additional fields appear: enter the distributor and its position in the tree.
- Notice - enter a note to the created order, which will be displayed on the page with detailed information of this order (optional).
3. After filling out the form, click the "Next step" button. On the page of the second step "Product list", you must select the products that will be included in the order. On the page you can search by category, by SKU (product number) or by product name. You can also mark the field "Only products in stock", in order to display only products, that are in stock.
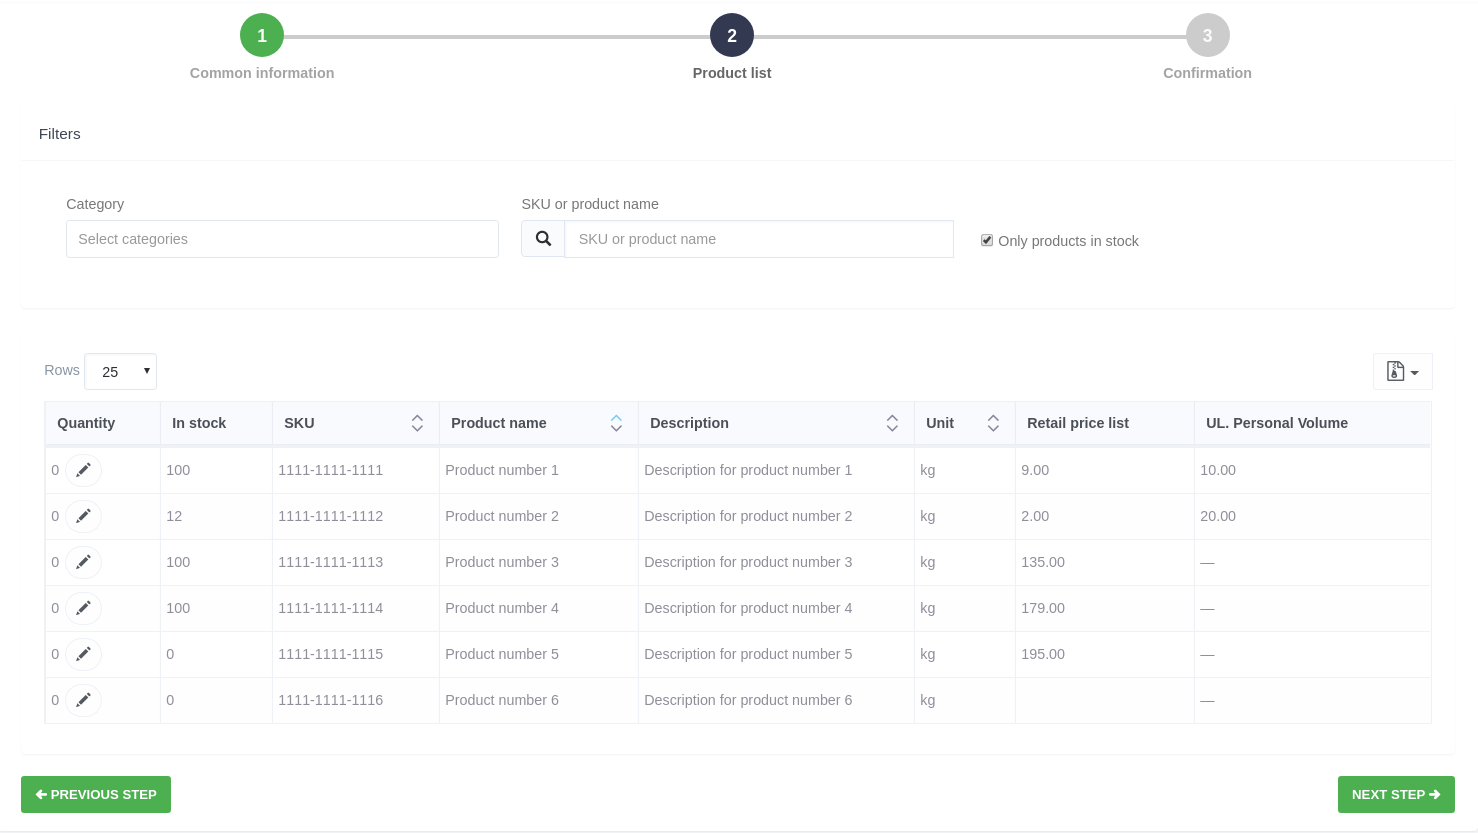
You can import the product list into a file (see "Working with tables").
4. The third step (Confirmation) displays the entire order with the possibility of adding a discount, editing the quantity, document number and note and also product removal.
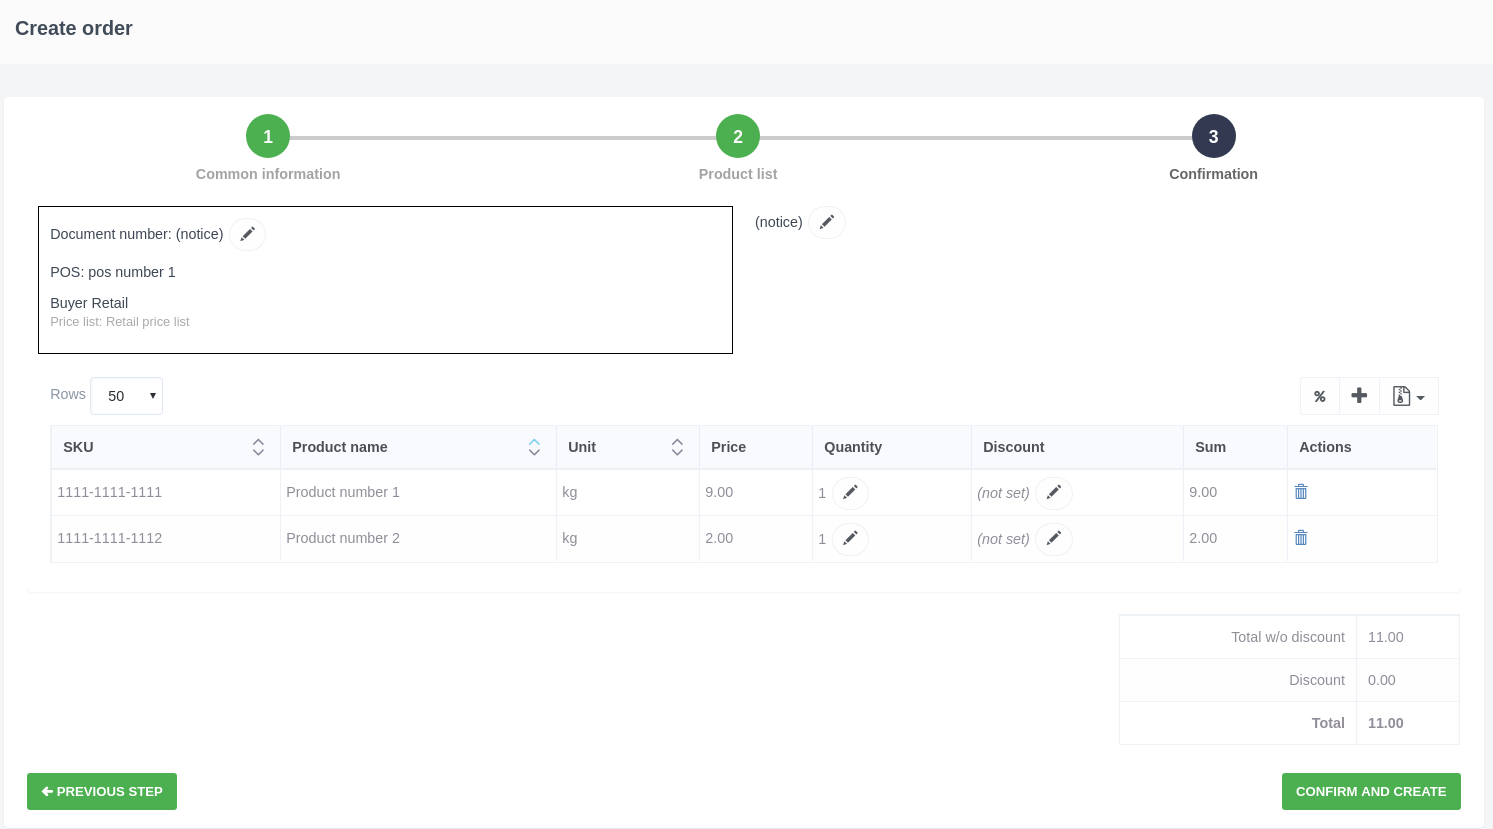
You can add a discount in two ways:
- using the edit icon - "pencil" in the product line;
- using the "%" icon in the table menu.
Also, at this step, you can add the product by using the "plus" icon in the table menu.
Clicking on the "plus" opens a window with a list of products. Add the quantity of desirable product. Then click the "Submit" button and the product will be added to the order list.
5. Check the data and click "Confirm and create" to create the order. The created order will be displayed at top of the list of orders.
Edit order
To edit order, follow these steps:
- Click on the order number, which is a link to the page with the order data.
- The opened form coincides with the order creation form in the third step, but with additional functions. Make the necessary changes and they automatically apply to the unpaid order.
Delete order
You can delete an order by clicking on the "Cross" icon (in the right), on which the confirmation window opens.

Click "OK" and the order will be deleted.
By clicking on the order number in the "Orders" section, which is a link opens a page with information about the order and the possibility to pay for it, issue a refund and print it.
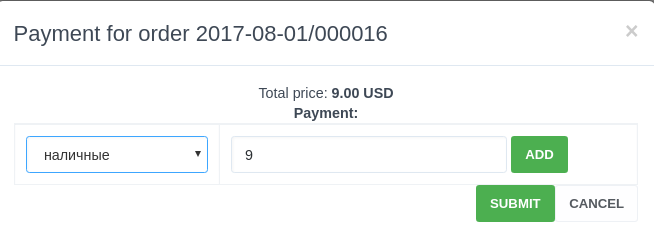
Pay for the order
You can pay for the order fully or partly, from one or more available wallets.
In order to pay for the order, follow these steps:
- Click on the "Pay" button on the toolbar. Enter the required amount in the form that opens. Types of payments, wallets are configured in POS.Wallet payments.
- To add a wallet click the "Add" button at the end of the line. To cancel, click the "basket" icon at the end of the line.
-
When the form is completed, click the "Submit" button and the order will be paid (the button "Pay" is no longer displayed on the toolbar in this order).
You can also create an order return.
Create return
Final form with a predefined list of products from the original order, which can be changed.
To make return order, follow these steps:
- Click the "Create return" button on the toolbar. The button is displayed only in orders with the statuses Completed and Shipped, respectively. On the return form that appears, the list of products is displayed, you need to check the information and click "Confirm and create".
- If necessary, you can edit the following data on the form:
- Enter the return number, if the number is not entered, it is assigned automatically.
- Note - you can enter a note.
- You can edit quantity, points, price, etc.
- In case, when not the entire order is returned, you have to change the "Quantity" field for the products. You can also set the quantity to 0 for non-refundable products. The total quantity of returned productss can not be more, than it was in the associated order document.
3. Click the "Confirm and create" button to go to the "Returns" section, where you create a new document for the return order (see the "Returns" section).

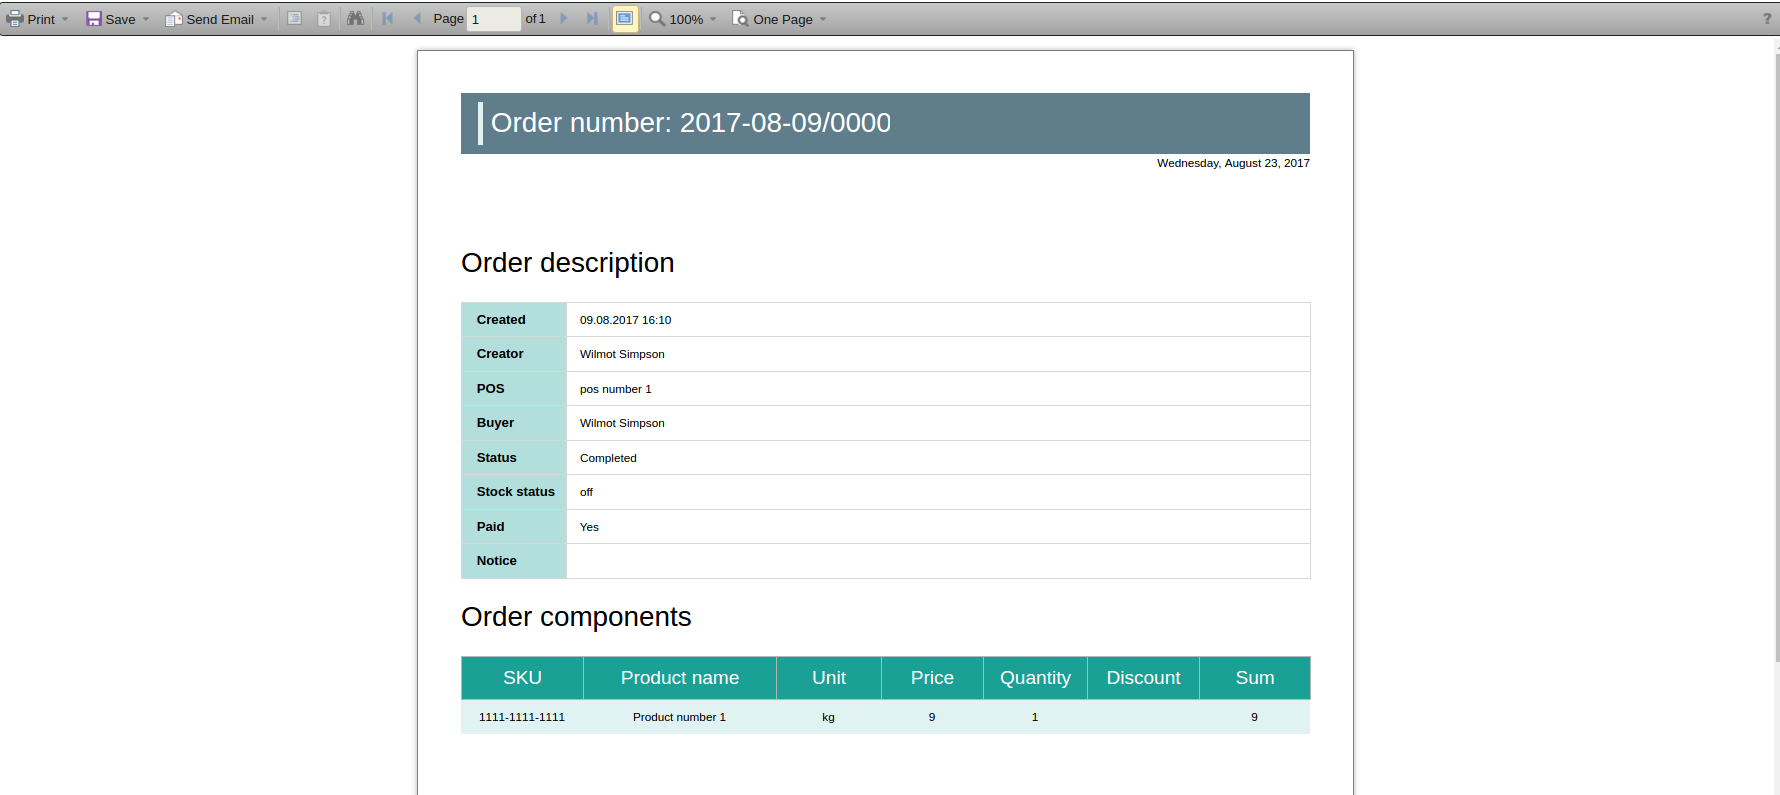
Print
To print a document (order), follow these steps:
- Click the "Print" button on the toolbar.
- The following options are available on the printed form: printing, saving to the computer, sending the form by e-mail, etc.
Daria T.
Comments